Part 1: Initial Setup & Reset
Hardware Setup
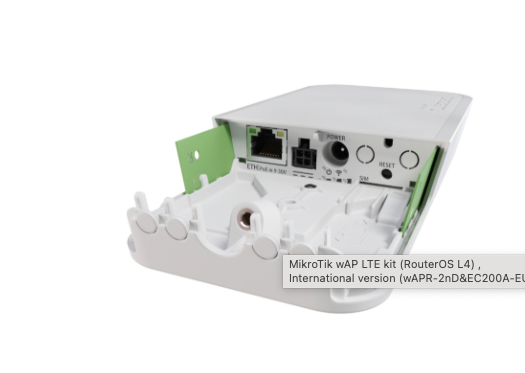
For this tutorial, we are going to use the wAP LTE kit.
- MikroTik Router: Single Ethernet port + WiFi capability
- Connection: Ethernet port (ether1) connected to Tenda router’s LAN2 port
- Tenda Router: Acts as our ISP gateway providing internet
Reset Process
The wAP LTE kit was discontinued and so the assumption is that you will most likely have a used one and so we will need to reset it.
Reset MikroTik to factory defaults. Todo this, you will need to power it off, then long press the reset button, then power it on and release the press when the WiFi led starts to blink.
Then on WinBox, when prompted “Keep/Remove/Accept default configuration?”, click “Remove Configurations button” default configuration.
We need to remove the default configurations because it comes with;
- Pre-configured firewall rules
- NAT configuration
- DHCP client on WAN
- Bridge setup with specific rules
- Various automatic settings
But in order to install/setup out billing/hotspot system, we need;
- Clean slate without conflicting rules
- Custom network architecture
- Full control over traffic management
- No interference from default firewall/NAT rules
- Ability to implement RADIUS, user management, and bandwidth control
So we have to decline the default configuration in order to get a complete control over the setup. You will lose connectivity of the mikrotik on WinBox and will refresh to see it again, and to log back into it, you will need to use the mac address, since there will be higher chances it will not have been assigned any ip address yet. For password, leave that bank and use admin after you select the mac address for sign in.
Part 2: Mikrotik Administration 101
Now before we dive into the configuration process, let us have have a little understanding of some concepts and terms we will be interacting with.
1. Network Interfaces
Network interfaces represent the physical or virtual ports through which data enters and leaves the router device, ie, the connection points for your router and the network - either physical (Ethernet ports) or virtual (WiFi radios, bridges, VLANs).
Types of Interfaces you will probably see in Your Setup (alongside others):
Physical Interfaces:
- ethernet ports: Physical Ethernet ports; the actual RJ45 on your device and in our case, ether1, the one we have connected to the primary router (Tenda which our isp configured).
- Wireless Interfaces: Physical WiFi radio (Atheros AR9300 chipset) that have wireless capabilities.
Virtual Interfaces:
- bridge: Virtual interface that connects multiple interfaces together into one logical interface, like a switch.
Think of interfaces like:
- Doors and windows in a building - each is an entry/exit point
- Your router manages traffic flowing through these points
2. DHCP (Dynamic Host Configuration Protocol)
DHCP is what will automatically assign IP addresses and network settings to devices that will be connected to your wifi (DHCP server option), and is what also configures your mikrotik to get IP address from the primary gateway (DHCP client option).
The explanation mentions two DHCP rules;
1. DHCP Client (Your MikroTik on ether1):
The MikroTik receives IP address from Tenda router, in a similar manner to being a tenant receiving an apartment number from landlord The purpose of this is to get internet connectivity from our upstream router.
Here the configuration we will use include;
- Interface: ether1 (our mikrotik has just one)
- Use Peer DNS: Yes (get DNS servers from Tenda)
- Use Peer NTP: Yes (get time servers from Tenda)
- Add Default Route: Yes (make Tenda the gateway to internet)
This will result in the MikroTik getting an IP address such as 192.168.0.100 from the Tenda router.
2. DHCP Server (Your MikroTik for WiFi clients):
The MikroTik will then be able to give IP addresses to the devices that will be connected to it, but here acting like a landlord assigning apartment numbers to tenants instead. The purpose will be to be able to provide network settings to WiFi clients
The configurations we will do here include;
- Interface: bridge
- DHCP Pool: 192.168.88.2-192.168.88.254
- Gateway: 192.168.88.1 (the MikroTik itself)
- DNS: Inherited from Tenda via DHCP client
This will result in WiFi clients getting IPs like 192.168.88.254 etc that will be assigned by the mikrotik.
3. IP Addressing
An IP (Internet Protocol) address is a unique identifier for devices on a network, like a street address. This should not be confused with a mac address which which is the permanent hardware-based identifier given to the device by the manufacturer. We will use an IPv4 as example here (there is a history and a lot other things about this and another version, IPv6, which I will not get into here).
IP Address Format: 192.168.88.1/24
Breaking it down:
- 192.168.88.1: This is the actual IP address
- /24: is called the subnet mask (defines network size)
To break this down, the /24 = 255.255.255.0 in decimal The first 3 numbers, 192.168.88, identifies the network itself, last number is the host. The usable IPs range from 192.168.88.1 to 192.168.88.254 (254 addresses). A broadcast address is 192.168.88.255, which we can call the “shout-to-everyone” address.
Your Network Architecture will probably look like this:
Internet
   ↓
Tenda Router (192.168.0.1)
   ↓ (192.168.0.0/24 network)
MikroTik ether1 (192.168.0.100) ← DHCP Client
   ↓
MikroTik bridge (192.168.88.1) ← Gateway for clients
   ↓ (192.168.88.0/24 network)
WiFi Clients (192.168.88.2-254) ← DHCP Server
4. Bridges
You remember the interfaces we talked about? Without bridges, devices connected to these ports would not be able to communicate to each other.
A mikrotik bridge is a virtual switch that connects multiple physical or logical network interfaces into one logical “super-port” where everything connected acts like being plugged into the same switch.
Using our apartment building analogy, if it has 4 separate apartments (ether2, 3, 4, 5) on the same floor. Without a bridge, people in apartment ether2 can’t talk to people in the other apartments, and if they need to, they have to go through the hallway, which is slow and complicated. A bridge “knocks down the small apartments” to create a one big open space through which people in the different apartments (ports) can communicate without involving the hallway (router CPU).
Why We Will Need a Bridge:
Without bridge:
- wlan1 (WiFi) would be separate from ether1 (Ethernet)
- Devices on WiFi would not be able to communicate with ethernet network
- No shared network = no internet for WiFi clients
With bridge:
- WiFi and other interfaces will be able to share the same network
- Devices will see each other
- We will have a unified network management
Now this is what our bridge configuration will look like;
- Bridge Interface: bridge (IP: 192.168.88.1/24)
- Bridge Ports: wlan1 only
- Note: We will also need to remove ether1 from bridge for proper network address translation (NAT) routing.
While configuring the bridge, we remove the ether1 because it connects to upstream network (Tenda), and also because the bridge will contain internal network (WiFi clients). This separation is needed for proper routing and NAT.
MikroTik WiFi Systems:
The mikrotik we are using has two WiFi systems;
Old System: “Wireless” (wlan1)
- Package: wireless
- Interface: wlan1
- Driver: Atheros AR9300 (older chipset driver)
- Menu: Wireless
- Status: This is what we used
New System: “WiFi” (wifiwave2)
- Package: wifi-qcom or wifi-qcom-ac
- Interface: wifi1, wifi2
- Driver: Qualcomm wifiwave2 (modern driver)
- Menu: WiFi
- Status: This is NOT installed on our router although it is present on the menu and so we will ignore it.
6. WiFi Modes
Let us understand the different WiFi modes.
Station Mode:
In this mode, the router device acts as WiFi client and connects to another WiFi network, kind of like your phone connecting to WiFi This can be applied when extending existing WiFi, say you connect the mikrotik to another WiFi, and then share it via the Ethernet port.
AP Bridge Mode (What we will configure):
In this mode, the router device acts as WiFi access point that broadcasts WiFi for devices to connect, while being able to assign them ip addresses, which you have to configure. This mode is suitable for providing WiFi to clients (hotspots, home networks, etc)
Other Modes:
- Bridge: Advanced bridging without routing
- Station Bridge: Client mode with bridging
- WDS: Wireless Distribution System (point-to-point links)
What Our Configuration will look like:
- Mode: ap bridge
- SSID: MikroTik (your custom name)
- Band: 2GHz-B/G/N (supports most devices)
- Frequency: 2412 (Channel 1)
7. WiFi Security
This is where security profile configuration would take place.
The authentication modes include;
- None: No security (open network) - DON’T USE
- Static Keys: WEP encryption (outdated, insecure)
- Dynamic Keys: WPA/WPA2 (modern, secure) which is what we will configure.
When you got to Wireless and then click the Security Profiles tab, and double click default, you will see the authentication types;
- WPA PSK: WiFi Protected Access (older). PSK = Pre-Shared Key (the password everyone uses)
- WPA2 PSK: Modern standard (what we will use) ✓
- WPA3: Newest standard (not all devices support)
This is what our WiFi configuration will look like;
- Mode: dynamic keys
- Authentication: WPA2 PSK
- Password: Your 8+ character password
8. NAT (Network Address Translation)
NAT is a service that enables private IP networks to use the internet by translating private IP addresses in an internal network to a public IP address before communication with the external network.
With NAT, an organization needs one IP address or one limited public IP address to represent an entire group of devices as they connect outside network.
Our network will have two IP ranges:
- External (Tenda network): 192.168.0.0/24
- Internal (Your WiFi): 192.168.88.0/24
Now, without NAT, a WiFi client (192.168.88.254) sends packet to internet, the Tenda router receives packet from 192.168.88.254, but doesn’t know how to route back to 192.168.88.x and this the connection fails.
With NAT (Masquerade), the client sends a packet, the MikroTik translates source to 192.168.0.100 (its WAN IP), the Tenda sees packet from 192.168.0.100 and knows how to reply. The MikroTik translates back to 192.168.88.254 and the connection succeeds.
NAT Types:
srcnat (Source NAT) - What we will configure:
This changes source IP of outgoing packets (those leaving your network) and is used for internet access from internal network
- Chain: srcnat
- Action: masquerade
dstnat (Destination NAT):
Changes destination IP of incoming packets helps in port forwarding, redirecting traffic to devices connected to the mikrotik
- Chain: dstnat
- Example use: Hotspot login page redirect
Our Configuration:
- Chain: srcnat
- Out. Interface: ether1
- Action: masquerade
9. Routing
Routing determines the path packets take through networks.
Our Routing Setup (automatic via DHCP Client):
Destination: 0.0.0.0/0 (all internet traffic)
Gateway: 192.168.0.1 (Tenda router)
Interface: ether1
This means that any traffic not destined for local network (192.168.88.0/24) gets sent to Tenda router for internet access.
With that out of the way, now we move to the configuration bit.
Part 3: Step-by-Step Configuration, Verification, and Troubleshooting
Step 1: Configure Internet Connection (DHCP Client)
You remember when you reset the mikrotik we lost access? What happened was that the device lost its IP address and the Tenda device could not reassign it another before configuring its (the mikrotik) DHCP Client.
So, purpose of this is to get internet from Tenda router or whichever one you are using.
Navigation: IP → DHCP Client
Configuration:
- Click + to add new
- Settings:
- Enabled: ✓ Checked
- Interface: ether1
- Use Peer DNS: ✓ Checked
- Use Peer NTP: ✓ Checked
- Add Default Route: yes (default)
- Click OK
To verify this worked:
- Go to IP → Addresses
- Should see: 192.168.0.100/24 on ether1 (marked “DS” - Dynamic, Slave)
You can also confirm this by exiting the WinBox and opening it again. When you do this, you will see the mikrotik but now with an ip address (initially was 0.0.0.0), click this, and sign in without a password, and you should be logged in and see a terminal window. You can go ahead and set a new password here.
Congratulations, you just set your mikrotik to act as a DHCP Client to your primary router device.
Now here is what happened:
- MikroTik requested IP from Tenda
- Tenda assigned 192.168.0.100
- MikroTik received DNS servers and default route
- Internet connectivity established
Step 2: Enable WiFi Interface
After you configure DHCP Client, you will notice your mikrotik still can’t broadcast WiFi, the led will still be off.We need to activate the WiFi radio to broadcast network.
Navigation: Wireless → Interfaces
Configuration:
- Find wlan1 (will be disabled/grayed out)
- Right-click → Enable (or select and click enable button)
- Double-click wlan1 to configure
General Tab:
- Enabled: ✓ Checked
- Name: wlan1
- Type: Wireless (Atheros AR9300)
- MTU: 1500 (default)
- MAC Address: (hardware address, don’t change)
- ARP: enabled
Click Apply.
Wireless Tab (CRITICAL SETTINGS):
- Mode: ap bridge (NOT station!)
- Band: 2GHz-B/G/N
- Channel Width: 20MHz
- Frequency: 2412 (Channel 1) or choose 2437 (Ch 6) or 2462 (Ch 11)
- SSID: Your WiFi network name (e.g., “MikroTik-Hotspot”)
- Security Profile: default
- Country: (your country)
- Default Authenticate: ✓ Checked
- Default Forward: ✓ Checked
- Click OK
Status should change to: “running ap”
Step 3: Configure WiFi Security
We now need to protect WiFi with password.
Navigation: Wireless → Security Profiles
Configuration:
- Double-click default profile
- Settings:
- Name: default
- Mode: dynamic keys (NOT “none”)
- Authentication Types:
- ✓ Check WPA2 PSK
- WPA2 Pre-Shared Key: Your password (minimum 8 characters)
- Click OK
Here are some security considerations to keep in mind at this point;
- WPA2 PSK is standard for most devices
- Use strong password (mix of letters, numbers, symbols)
- Don’t use common words or patterns
- For hotspot billing, you may later redirect to login page
Step 4: Create Bridge
We then need to create unified network for WiFi clients.
Navigation: Bridge → Bridge tab
Configuration:
- Click + to add new bridge
- Settings:
- Name: bridge (or bridge1)
- Leave other settings as default
- Click OK
This creates a virtual interface that will act as the gateway for your WiFi network.
Step 5: Add WiFi to Bridge
This will connect WiFi interface to bridge.
Navigation: Bridge → Ports tab
Configuration:
- Click + to add port
- Settings:
- Interface: wlan1
- Bridge: bridge
- Click OK
It is important to note that we did NOT add ether1 to bridge. Here’s why:
ether1 purpose: WAN connection to Tenda (external network) bridge purpose: LAN network for WiFi clients (internal network)
Keeping them separate allows proper routing and NAT between internal and external networks.
Step 6: Assign IP to Bridge
This configuration will give bridge an IP address to act as gateway.
Navigation: IP → Addresses
Configuration:
- Click + to add new address
- Settings:
- Address: 192.168.88.1/24
- Network: 192.168.88.0 (auto-calculates)
- Interface: bridge
- Click OK
After this, you should now see TWO IP addresses:
- 192.168.0.100/24 on ether1 (WAN - from Tenda)
- 192.168.88.1/24 on bridge (LAN - your gateway)
At this pint you may be asking yourself why 192.168.88.0/24?. Here is why;
- This should be different from Tenda’s network (192.168.0.0/24)
- It helps avoid IP conflicts
- This also creates clear separation between WAN and LAN
Note that you can use any private range (192.168.x.x, 10.x.x.x, 172.16-31.x.x). There is more to the IP addresses beginning with 10….. and 172… and others that I will not touch on as well.
Step 7: Setup DHCP Server
Now up until this point, you will realize that when you try to connect to the mikrotik’s WiFi, you will get a notification “Could Not Get IP Address”. If you recall, we need to set the mikrotik’s DHCP Server to enable it automatically assign IPs to its WiFi clients.
Navigation: IP → DHCP Server
Configuration:
- Click DHCP Setup button (wizard)
- DHCP Server Interface: Select bridge or bridge1
- Click Next
- DHCP Address Space: Change to 192.168.88.0/24 (This should autofill)
- Click Next
- Gateway for DHCP Network: 192.168.88.1 (should auto-fill as well)
- Click Next
- Addresses to Give Out: 192.168.88.2-192.168.88.254 (should auto-fill as well)
- Click Next
- DNS Servers: Should auto-populate from Tenda (via DHCP client)
- Click Next
- Lease Time: 10m (default is fine, can change later)
- Click Next to finish
Here is what we have just configured;
- DHCP Server on bridge interface
- IP Pool: 192.168.88.2-254 (253 addresses available)
- Network: 192.168.88.0/24
- Gateway: 192.168.88.1
- DNS: Inherited from upstream
At this pint, your mikrotik WiFi’s clients can connect and get IP addresses, but NO INTERNET yet. This is where the Network Address Translation we mentioned earlier comes in.
Step 8: Configure NAT (Enable Internet)
The purpose of this is to allow WiFi clients to access internet through Tenda.
Navigation: IP → Firewall → NAT tab
Configuration:
- Click + to add new rule
- General tab:
- Chain: srcnat
- Out. Interface: ether1
- Action tab (click this tab at top):
- Action: masquerade
- Click OK
Common Error & Solution: If you see: “in/out-interface matcher not possible when interface is slave”
What this means is that ether1 was added to bridge, making it a “slave” of the bridge.
To solve this, remove ether1 from bridge;
- Go to Bridge → Ports
- Find entry where Interface = ether1
- Right-click → Remove (or select and click X)
- Now NAT rule will work
This solves the issue because;
- ether1 must be independent for NAT
- Bridge contains only internal interfaces (wlan1)
- NAT translates between bridge (internal) and ether1 (external)
Check Internet on MikroTik
Navigation: New Terminal
Commands to verify:
/ping 8.8.8.8
Should see replies - confirms internet works on MikroTik
/ip address print
Should see both IP addresses:
- 192.168.0.100/24 on ether1
- 192.168.88.1/24 on bridge
/ip route print
Should see default route via Tenda (192.168.0.1)
Check WiFi Client Connection
From your phone or laptop, you should be able to;
- See WiFi network: Should see your SSID
- Connect with password: Enter WPA2 password (what you set earlier)
- Get IP address: Should get 192.168.88.x address
- Gateway: Should show 192.168.88.1
- DNS: Should show DNS from Tenda
- Test internet: Open browser, load website
If for some reason the internet doesn’t work quite yet, check:
- NAT rule exists (IP → Firewall → NAT)
- ether1 not in bridge (Bridge → Ports)
- Default route exists (IP → Routes)
Check DHCP Leases
Navigation: IP → DHCP Server → Leases tab
What to look for:
- Connected clients listed
- Shows: MAC address, IP address, hostname
- Status: bound (active lease)
Example:
Address: 192.168.88.254
MAC: AA:BB:CC:DD:EE:FF
Host Name: Android-Phone
Status: bound
If you get to this point, sip some coffee, you are a network engineer 🥳🎉. If you did not get here, below are some issues you can check out to help you troubleshoot what you might be missing.
Troubleshooting Common Issues
Issue 1: Can’t Get IP Address
Symptoms: WiFi connects but says “obtaining IP address” forever
Causes & Solutions:
-
No DHCP Server
- Check: IP → DHCP Server (should have entry for bridge)
- Fix: Run DHCP Setup wizard
-
Wrong DHCP Interface
- Check: DHCP server on bridge, not wlan1
- Fix: Delete and recreate DHCP server on correct interface
-
Bridge has no IP
- Check: IP → Addresses (bridge should have 192.168.88.1/24)
- Fix: Add IP address to bridge
-
wlan1 not in bridge
- Check: Bridge → Ports (should have wlan1)
- Fix: Add wlan1 to bridge ports
Issue 2: Gets IP but No Internet
Symptoms: Device shows connected, has IP, but can’t load websites
Causes & Solutions:
-
No NAT Rule
- Check: IP → Firewall → NAT (should have srcnat masquerade rule)
- Fix: Add NAT rule with srcnat, ether1, masquerade
-
ether1 in bridge (slave conflict)
- Check: Bridge → Ports (ether1 should NOT be there)
- Fix: Remove ether1 from bridge ports
-
No Default Route
- Check: IP → Routes (should have route to 0.0.0.0/0 via Tenda)
- Fix: Check DHCP Client settings, ensure “Add Default Route” = yes
-
MikroTik has no internet
- Test: Terminal → /ping 8.8.8.8
- Fix: Check ether1 DHCP client, verify cable to Tenda
Issue 3: WiFi Not Visible
Symptoms: Can’t see SSID when scanning for networks
Causes & Solutions:
-
wlan1 disabled
- Check: Wireless → Interfaces (should show “running ap”)
- Fix: Right-click wlan1 → Enable
-
Wrong Mode
- Check: wlan1 mode should be “ap bridge”, not “station”
- Fix: Change mode to ap bridge
-
SSID not set
- Check: wlan1 wireless tab, SSID field
- Fix: Enter your network name
-
Frequency issues
- Check: Band and frequency settings
- Fix: Use 2GHz-B/G/N and standard channel (1, 6, or 11)
Issue 4: WiFi Connects but Asks for Password Repeatedly
Symptoms: Device keeps asking for password, won’t authenticate
Causes & Solutions:
-
Wrong password
- Most common cause
- Fix: Verify password in Security Profiles
-
Security profile not set
- Check: wlan1 → Security Profile = default
- Fix: Select default profile
-
Security mode mismatch
- Check: Security profile mode = dynamic keys with WPA2 PSK
- Fix: Configure proper authentication types
-
Old credentials cached
- Device remembering old password
- Fix: Forget network on device and reconnect
Network Architecture Summary
INTERNET
   |
   | (Public IP)
   |
[Tenda Router] 192.168.0.1
   | LAN Port 2
   | 192.168.0.0/24 network
   |
   | (DHCP: 192.168.0.100)
   |
[MikroTik ether1] ─────[DHCP Client]
   |
   | [NAT: srcnat masquerade]
   |
[MikroTik bridge] 192.168.88.1/24 ─────[DHCP Server: 192.168.88.2-254]
   |
   | (Bridge Port)
   |
[MikroTik wlan1] ─────[WiFi AP: "MikroTik"]
   |
   | (WPA2 PSK)
   |
[WiFi Clients] 192.168.88.2-254
Traffic Flow (Client to Internet):
- Client (192.168.88.254) → Packet to google.com
- Goes to gateway (192.168.88.1 - bridge)
- Routed to ether1 via default route
- NAT changes source to 192.168.0.100
- Packet sent to Tenda (192.168.0.1)
- Tenda sends to internet
- Reply comes back, NAT translates to 192.168.88.254
- Client receives response
Part 4: Next Steps for Billing System
Allow me to introduce ISPMAN!!
At this point, your configuration is ready for:
-
MikroTik User Manager
- Built-in RADIUS server
- User database management
- Bandwidth control
-
Hotspot System
- Captive portal (login page)
- Integration with billing
- Session management
-
External RADIUS
- FreeRADIUS
- Splynx
- UCRM
- Custom billing platforms
Before Installing Billing System
Backup current configuration
Files → Backup
Save file: pre-billing-backup.backup
which you can restore later bt:
/import file-name=my-config.rsc
ISPMan is a comprehensive platform designed to streamline billing and network operations for Internet Service Providers. It offers tools for managing Wireless networks, customer accounts and automating billing processes all in one place
The system is built using the elixir programming langauge which scalable, and fault tolerant. Its concurrency enables the system to handle millions of users without performance degrade, and with minimal downtime.
If you are an ISP and looking for value for your business, check out ISPMan. We also have a 24/7 available customer support that is always ready to help you find solutions. We have already expanded accross East and West Africa, Europe, and in the USA.
This is the system I am going to install in the mikrotik. But just before we do that, let us fix a misconfiguration we made. Remember under Wireless -> Security Profiles we added a dynamic keys mode and enabled WPA2 PSK? Yes, we need to remove that and select a none mode and that is it. This will enable the billing system to not require a password before we even access the packages.
Once this is done, we will go ahead and create an account with ISPMan. Then we will go to the devices page and add a device. After that we will download the installation script (click on the device you created and you will see a button to download the script).
Next, we will upload this script to WinBox;
Navigation: Files then click upload
You will select the script from wherever you downloaded it on you machine. Then you will navigate to a new terminal window and import this file, then click enter to run it.
This will install the billing system on your mikrotik. After this there is the bit in your ISPMan account where you will add hostspot to the device. Under devices where you downloaded the script, click add hotspot and this will show a popup. Note that out device can broadcast hotspot and so we will add hotspot and not hotspot server. The latter is for devices that do not have wlan1 by default (cannot broadcast WiFi).
At this point, you should be able to see a hostpot package you added when you turn on your WiFi and when you click it, you should be directed to the captive page. With this you are able to sell your neighbours hotspot, while having fun with it.
Reach out to us through our contacts if you need help setting up a hotspot business and we will make your dream a reality while offloading all the heavy tasks from you.
That’s about it for this one.
Document Created: November 12, 2025 MikroTik RouterOS Version: 7.18.2 Hardware: MikroTik with Atheros AR9300 WiFi